Tuesday, January 26, 2016

French Chair Makeover

It's finished!  In my last post I showed my Ballard Knock Off Document Fabric that I made to recover the chair seat.  I used the CitraSolv method and some graphics from Graphics Fairy to create my own custom fabric!  I am so in love with the results!  Now the chair is done and ready for the reveal.


First, the 'before' shots.  I found this chair at the GW Outlet for $5.75.  But when I got to the register,  the gal said all furniture was HALF PRICE!  WooHoo!  So I paid like $2.85 or something.


This floral fabric was under the dirty beige fabric.  YUCK!!


I primed the chair with a spray on then finished with brushed on white.  Hit it with the palm sander to distress it up a bit and then recovered the seat with my document fabric creation.  Here is my beauty.


Here's a closer look at the fabric.


And some detail on the back.


I was planning to sell it on Craig's List but now I am thinking I may keep it for my bedroom! 


I would love to hear your comments.  Linking up tho the parties below.  Thanks for stopping by!


Photobucket


Transformation Thursday

HookingupwithHoH


Furniture Feature Fridays

The Shabby Nest

UndertheTableandDreaming


The DIY Show Off


 http://linda-coastalcharm.blogspot.com/

Domestically Speaking

Boogieboard Cottage

Sunday, January 24, 2016

Valentine Love

I love decorating for Valentine's Day so much!  Red is also the primary accent color in my living room so it makes it easy to add in some fun Valentine pieces.  But it has to be the right shade, kind of an antique Barn red.  I found a few cute things in my favorite local shops and had fun making a few more.

I picked up these red bottles at GW the other day and knew I could make them into something fun.


I used some coffee beans as a filler for the tall bottle and added the pick from Hobby Lobby. A little burlap around the short bottle and a key and burlap string on the medium sized one. Displayed on a burlap covered charger, (also from Hobby Lobby) they make a fun centerpiece!


I also made a fun little sign for my mantle.  One perk of having new construction in your neighborhood is there is a lot of scrap wood available to scavenge!  I always stop by to see what 
they've thrown on the debris pile and find a lot of great 2x4 and 1x4 pieces.  They're the perfect size for signs.  

I painted this piece in my Barn red color.  I also painted a few shiny red heart shaped Christmas ornaments that came in a set from IKEA for a different project.  


I added a burlap heart, a key and a piece of burlap string.  They final touch was XOXO in the corner. I was going to paint them on but then I remembered I had these fun rub ons in a vintage font.  Love the finished product! 


Thanks for stopping by! Hope you'll join me at the fun parties below! Your comments are welcomed and appreciated!

Photobucket
 
The DIY Showcase@PinkWhen
 
Mad Skills Party @Mad In Crafts
 

Saturday, September 19, 2015

Harvest of Blessings

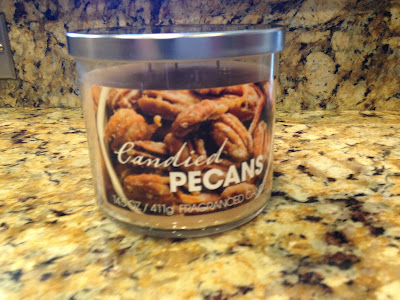
We've had a long, hot summer here in the Pac Northwest.  Lots of fires, drought conditions.  I am so ready for fall!  What really makes my heart happy is how the seasonal decor affects my family.  Mr. Wonderful and Maddy both love the fall decorations and every time they walk in the house they say "It smells so good in here!"  Some of my fave scents this time of year ...


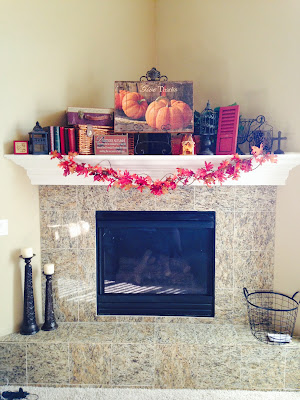
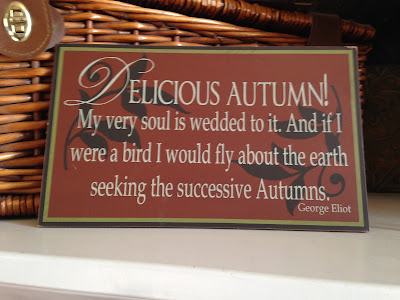
I have so much fall decor already but can never resist adding a few new items every year.  A few new additions to the mantle.


Little vignettes all over the house


And of course the front porch.  After killing several Chrysanthemums with my black thumb I finally invested in these faux varieties.  I'm happy to report that Mr. Wonderful asked me if they needed to be watered so they must look fairly real!


Hope you're enjoying the season and will join me at the fun parties below!  Your comments are most welcome!


Photobucket

Sunday, October 12, 2014

Thankful

I love this time of year!  The crisp mornings, the fall colors and of course pumpkin flavored everything!  And I really love the decorating for fall.  Our new front porch is much more roomy than the old place and I had a lot of fun with it.  Found this cute little wagon on Amazon.  I loved the green color for fall and it will be perfect for Christmas too!


So I got crafty this afternoon with some canvas and freezer paper.  Love this technique for transferring ink to fabric.  I started with a burlap canvas I found at Joann.


I made my design on the computer, flipped it to a reverse image and printed on the shiny side of freezer paper.  


I then carefully applied the wet ink face down to my burlap canvas and pressed with a hot iron for a minute or so.  It's important to press really hard and I even use the tip of the iron to burnish over each letter.  Carefully peel off the paper and you're done!


Love the finished product and the way it looks with the fall display in my entryway.  


This is a great method to transfer your designs to fabric for pillows, tote bags or anything you can think of!   You can even transfer photos.
 
Thanks for stopping by and your comments are treasured!  Linking up to these fun parties!
Photobucket
DIYShowOff
Inspiration Monday
By Stephanie Lynn